Week 5 - Timer and Checkpoints
- meekin-s
- May 10, 2023
- 3 min read
Updated: May 14, 2023
Checkpoint
I started out week 5 by researching on YouTube about how to make a lap system. In order to do this I had to make 2 variables. One is called Current Lap and the other is called Current Checkpoint. I then created a new blueprint called a checkpoint. I added a collision box so whenever the player goes through the checkpoint it will add a new lap. In order to make a lap the player must go through all of the checkpoints in order for a full lap to be counted.
This is the script that I made. It counts every checkpoint that the player goes through. Once it goes through 5 checkpoints it then adds a lap.


I then duplicated the blueprint 4 more times and changed the current checkpoint to the checkpoint's number. I removed the current lap details as it was not required.

I then made a simple cube and made it very tall and very thin to make it easier for the player to identify where the checkpoint is. I made it a blue colour to make it a striking contrast to the environment. I then placed the checkpoints into the level and placed the blue strips beside the checkpoint's collision. When debugging I found that the markers had a collision so I turned off the collision. I also added a sound effect to the box collision so that passing through a checkpoint is indicated to the player.

I then made a User Interface that counts the laps for the player making it easy for them to understand what lap the player is on.

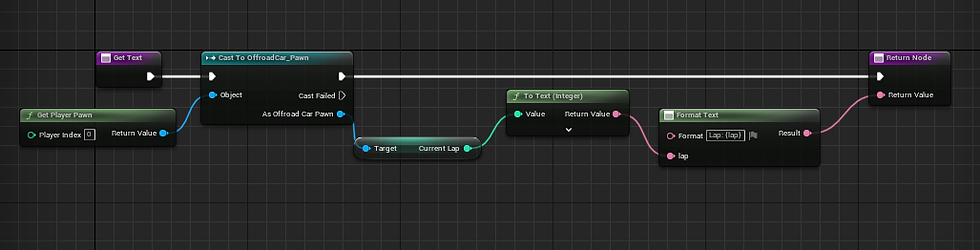
Once I placed the text onto the Canvas I then went into the event graph and created a function that will change the text to the lap number that the player is on.
Timer
To make the timer I had to go into the VehicleAdvGameMode. This is because each level will work in this game mode and it will apply the same timer function to each level.
To get started I made 3 variables that were all Integers. I named them Seconds, Minutes, and Milli Seconds. I then made a custom Event and I then got the node Set timer by event. I connected the Custom event to the timer event. I then added the time and made it 0.1 as it will add 1 MilliSecond. I then added a delay of 0.1 as this will also update the timer every 0.1 MilliSecond. I then did the following Script:

After I got the timer sorted it was time to add a widget that will display the timer to the player. I created a new User Widget. I added text to the widget 3 times and I then made them all 0 as I will create a function that will update the text. I then created a Variable for the time.

I made the texts into variables and gave them suitable names to identify them. I then made 4 Functions, 1 for the timer and the other 3 for the MilliSeconds, Seconds, and Minutes. For the timer, I made this Script to update the widget when the time is being updated. This then turns the numbers that are being calculated into text for the player to see their time.

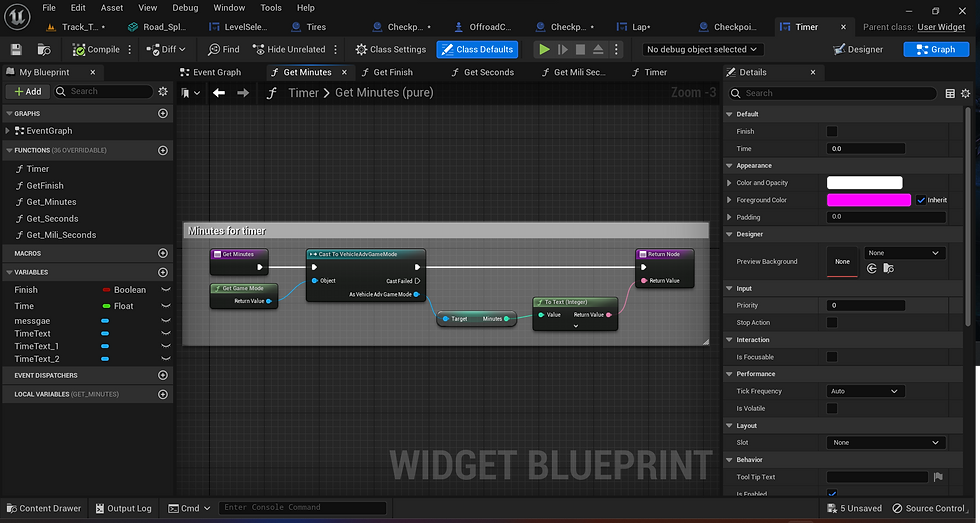
For the Milli Seconds function, I got the game mode that has the timer, VehicleAdvGameMode. I then got the Milli seconds variable that I created earlier and plugged it into a To Text node. I then plugged it into the return node of the Function. This prints out the Milli Seconds to the timer function above. I did the same method for the other 2 functions for Seconds and Minutes.


Comments